SEO (Search Engine Optimization) Settings
Note: our platform includes the professional version of a powerful plugin called SmartCrawl which allows you to implement sophisticated Search Engine Optimization with ease. However, if you’re not familiar with SEO or would prefer us to do that for you, just let us know.
Tweaking the SEO Settings of a Page
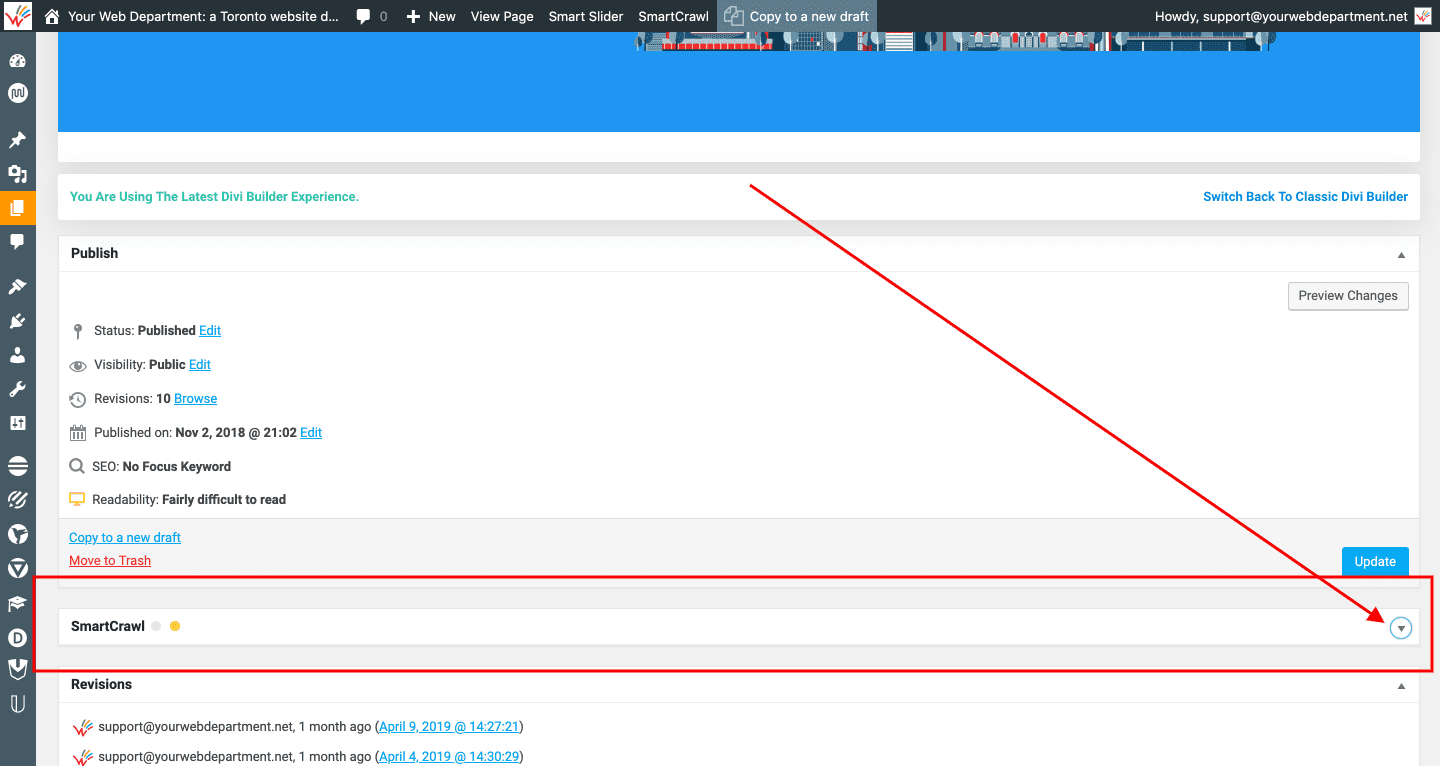
Navigate to the page in the Admin and scroll down until you see the SmartCrawl section. If it’s collapsed, click the small triangle to expand it:
Editing the Title and Meta Tags of a Page
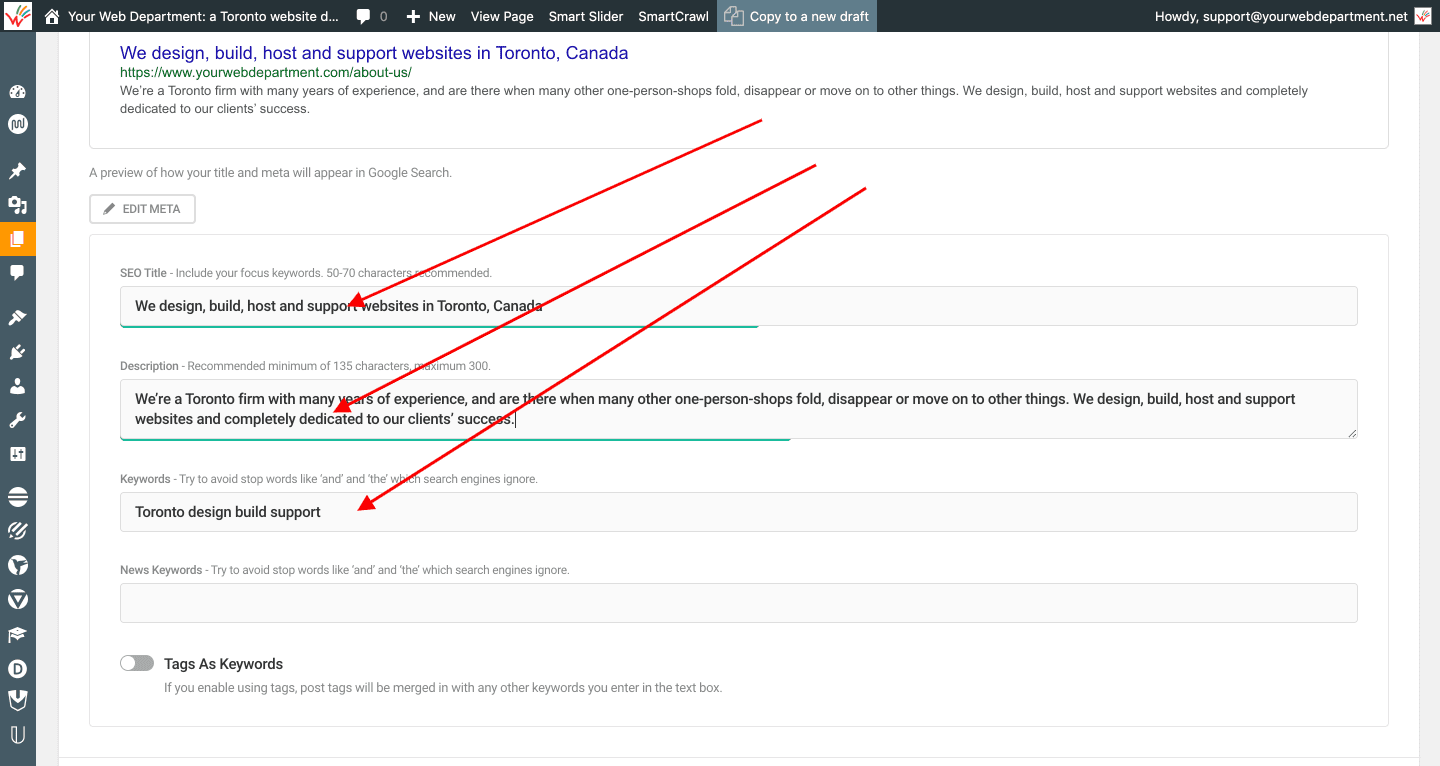
The system shows how a typical Google search result would look like for the page. To modify that, click the Edit Meta button:

If you have performed an SEO analysis of the page, you can specify which keywords are more likely to be used on searches, and therefore include them in the Title and Description. In the example below, we’ve tweaked them to include those keywords:
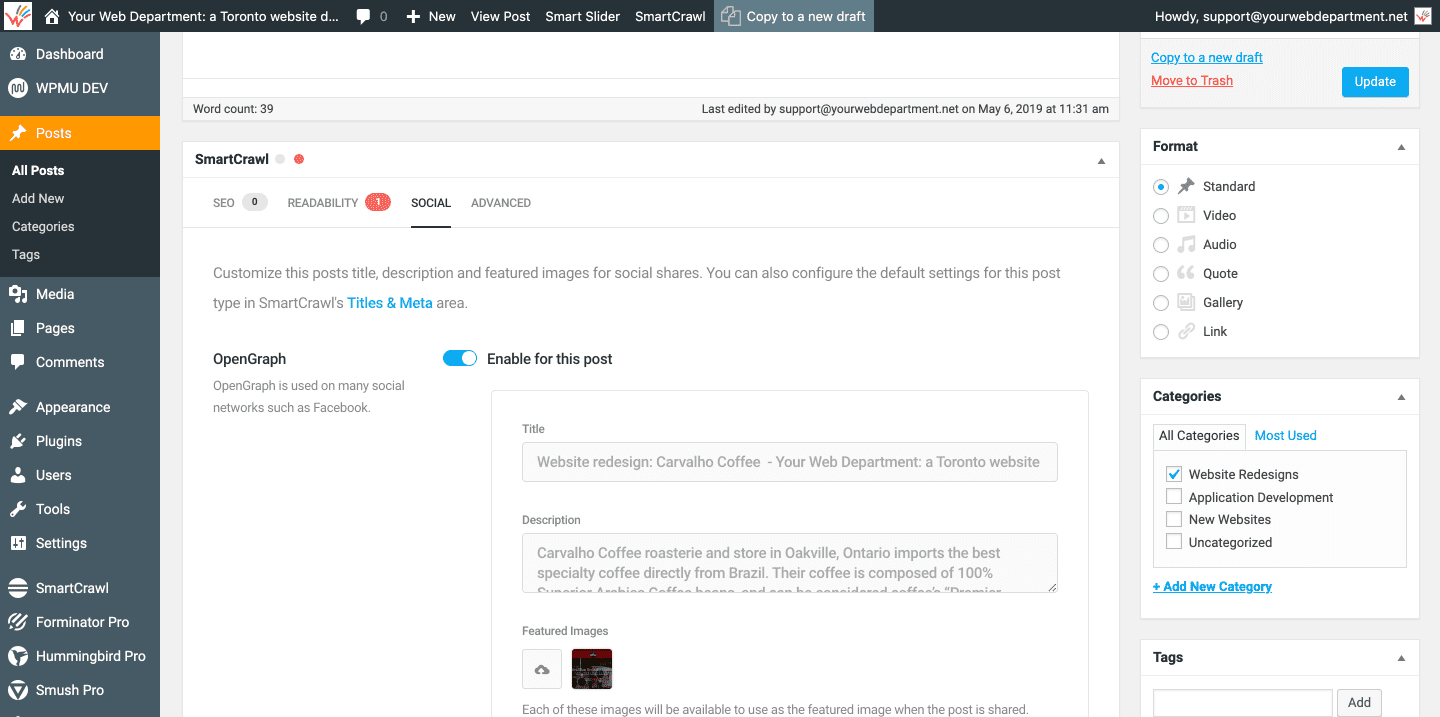
Modifying the Social Settings of a Blog Post
By default, when people share our post the Featured Image that you chose for the post will be used. You can change that, as well as the Title and Description that will be fetched by the social networks when the post is shared:
Setting Up 301 Redirects
A 301 Redirect is a Web server function where an old URL can be redirected to a new one. 301 Redirect is a “permanent” redirect status indicating that the resource has moved permanently. A 301 redirect is typically used on a website to ensure users and search engines can access the latest version of a webpage that has been moved from the original URL.
Setting 301 Redirects in SmartCrawl is very simple. From anywhere in the Admin select Advanced Tools under the SmartCrawl menu, then URL Redirection and the Add Redirect button. Note: if you prefer to edit pages in Desktop View mode and is currently editing pages or posts, the left column will be collapsed. Either go to the Admin Dashboard or locate the SmartCrawl icon in the left column.
Let’s say you had a page called “Press” (in a previous version of the website, for instance) which is now called “Media Appearances”. Enter the names of the pages preceded by a forward slash into the Old URL and the New URL field as in the example below. And you will typically want to make the Redirect permanent, so select that option for the Redirect Type.
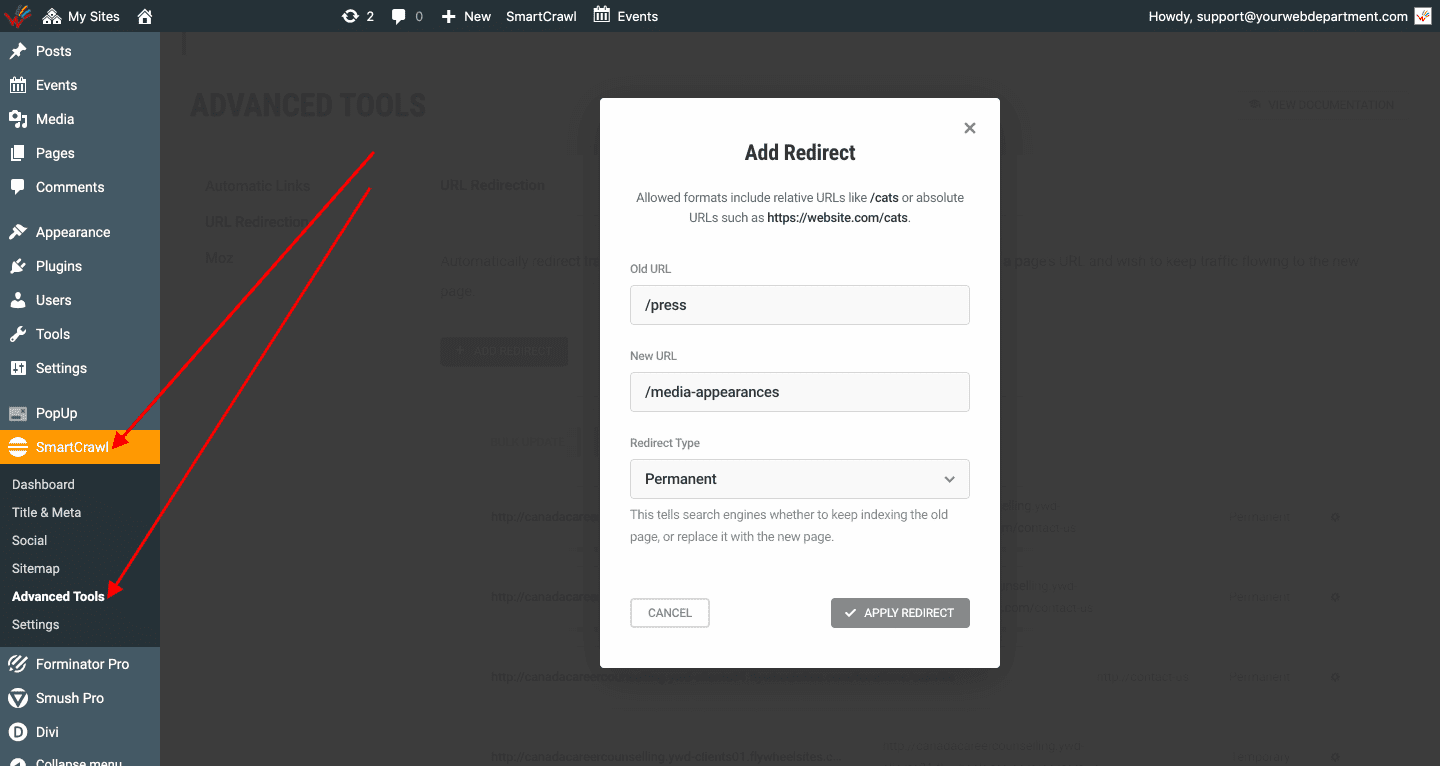
Click the Apply Redirect button, then the Save Redirects button at the bottom of the list. That’s it!
Using Google Search Console
Google Search Console is a free service offered by Google that helps you monitor, maintain, and troubleshoot your site’s presence in Google Search results. You don’t have to sign up for Search Console to be included in Google Search results, but Search Console helps you understand and improve how Google sees your site.
In order to access Google Search Console for your website, you need to very your ownership of the “property” (i.e. your website, in Google parlance) first.
To verify your ownership:
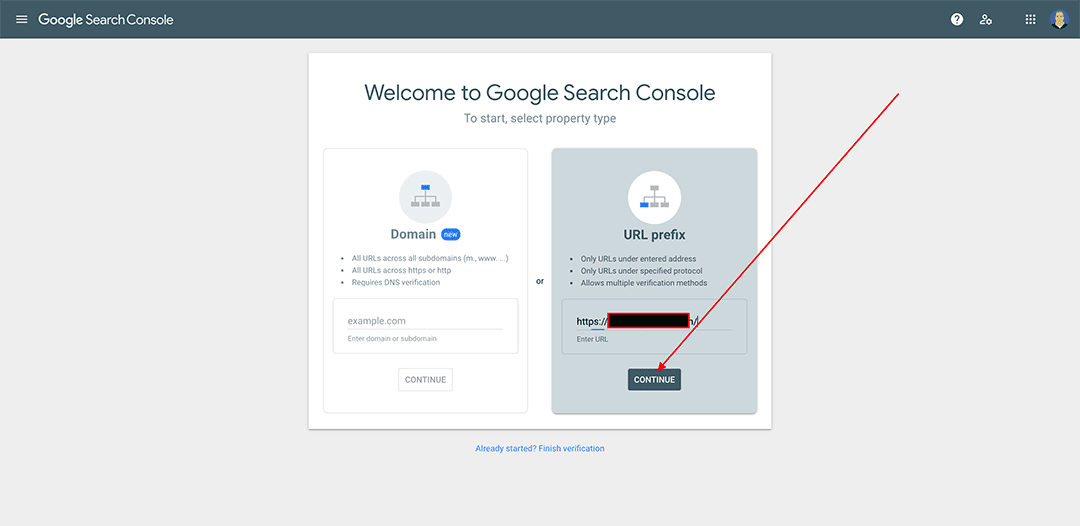
- Go to Google Search Console. If prompted to choose between Domain and URL prefix choose URL prefix – unless you’re an SEO expert or are familiar with DNS management, you should use the simple verification method that URL prefix provides. Paste your website’s full address e.g. https://www.mywebsite.com there and click CONTINUE:
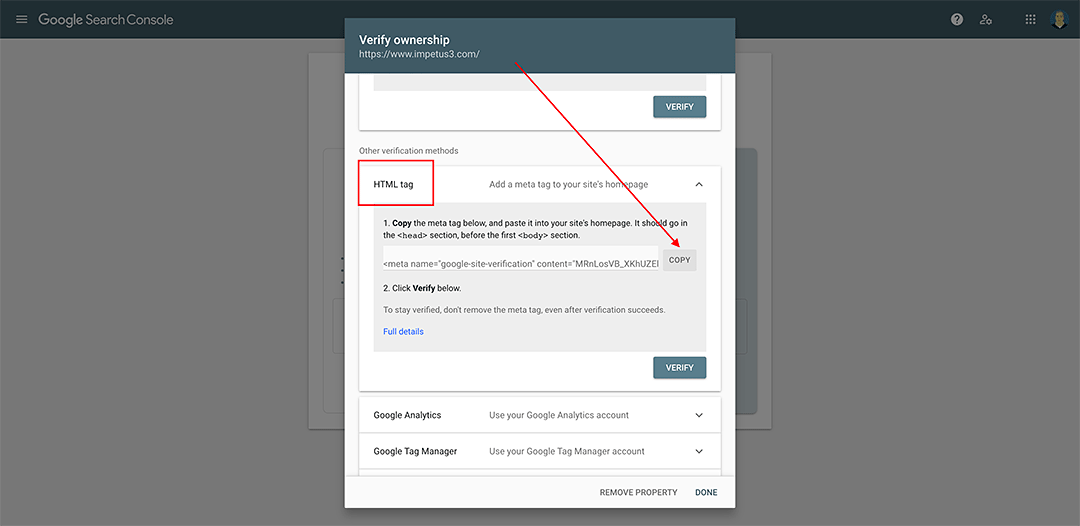
- Select the HTML tag method and click COPY:
- Now you need to add the verification code to your website. Open another browser tab, and load your website’s Admin in it. Go to Divi > Theme Options and select the Integration tab. Paste the verification code you just obtained from Google into an empty line of the the Add code to the <head> of your blog field, and then Save Changes.
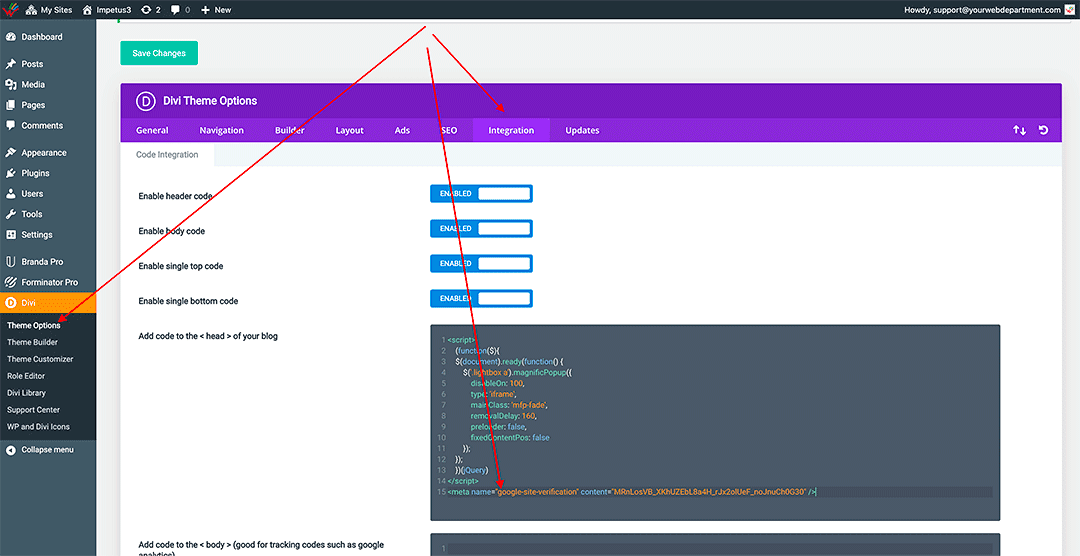
- Finally, go back to the tab where Google Search Console is open, and click the VERIFY button:
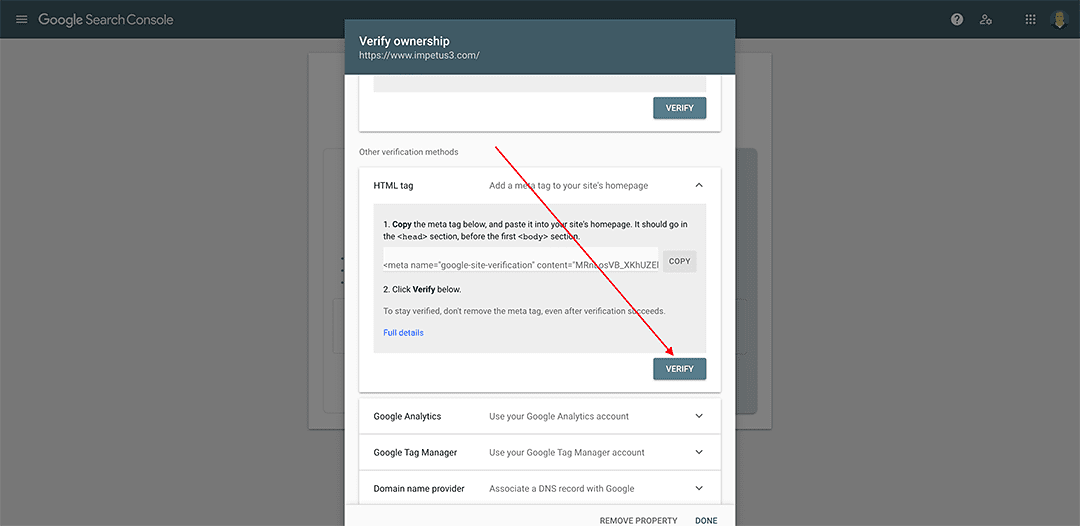
- If everything was done properly, Google should then display a screen similar to the one below. If not, make sure you followed the steps above correctly. You may also want to try clicking the VERIFY button again in a few minutes.

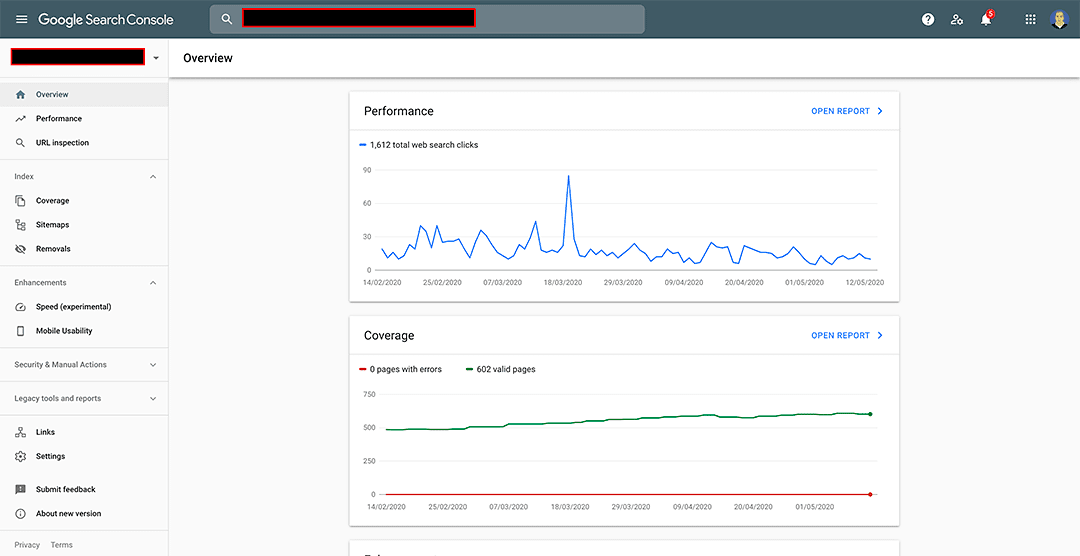
Typically Google Search Console takes about a day to do the initial processing of the data. After that, you will have access to all its reports, as well as the ability to submit a Sitemap and more:
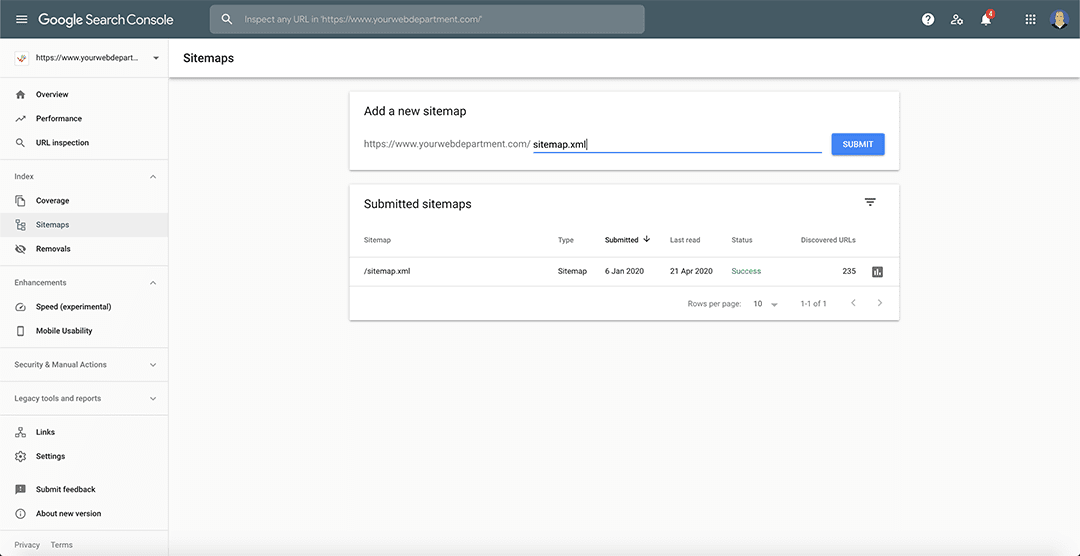
Submitting a sitemap to Google Search Console
- Sign in to Google Search Console.
- In the sidebar, select your website.
- Enter sitemap.xml in the Add a new sitemap field to complete the sitemap URL.
- Click Submit.